Reference No: 29167
Support has been provided so that the Schedule Itinerary at Order level has an option to define Estimated Work Time. The Estimated Work Time entries have an option to describe multiple Sub-Tasks.
When either Main Task or Sub-Tasks is selected at the Labor line, the Task field for Labor's Start and End Dates gets set as per the Order Task. If the Main Task is chosen, the Estimated Work Time is carried to the Labor lines.
Install the R2 (client) on your server.
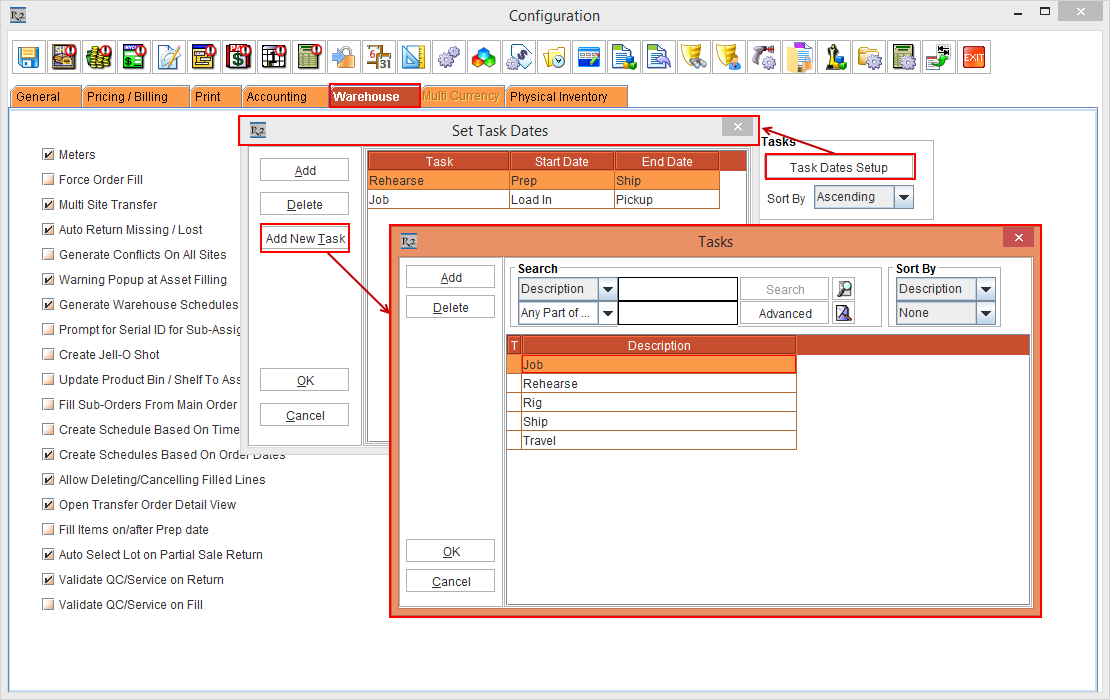
Login to R2 and select the Configuration module > Warehouse tab > click the Task Dates Setup button. The Set Task Dates window is displayed > click the Add New Tasks button. This is, as shown in the Figure 1.0.
From R2, Select the Account module > create a Rental Reservation Order [ORD-1400] for 5 days [11-Sept-2017 to 15-Sept-2017].
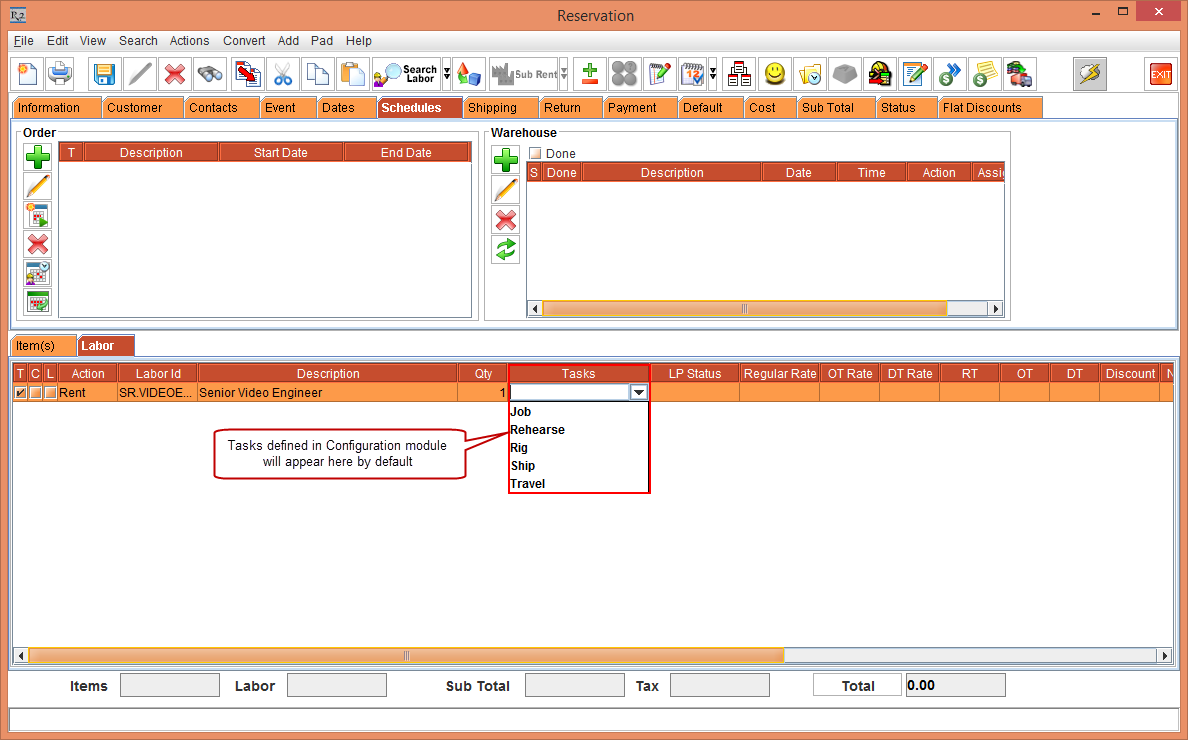
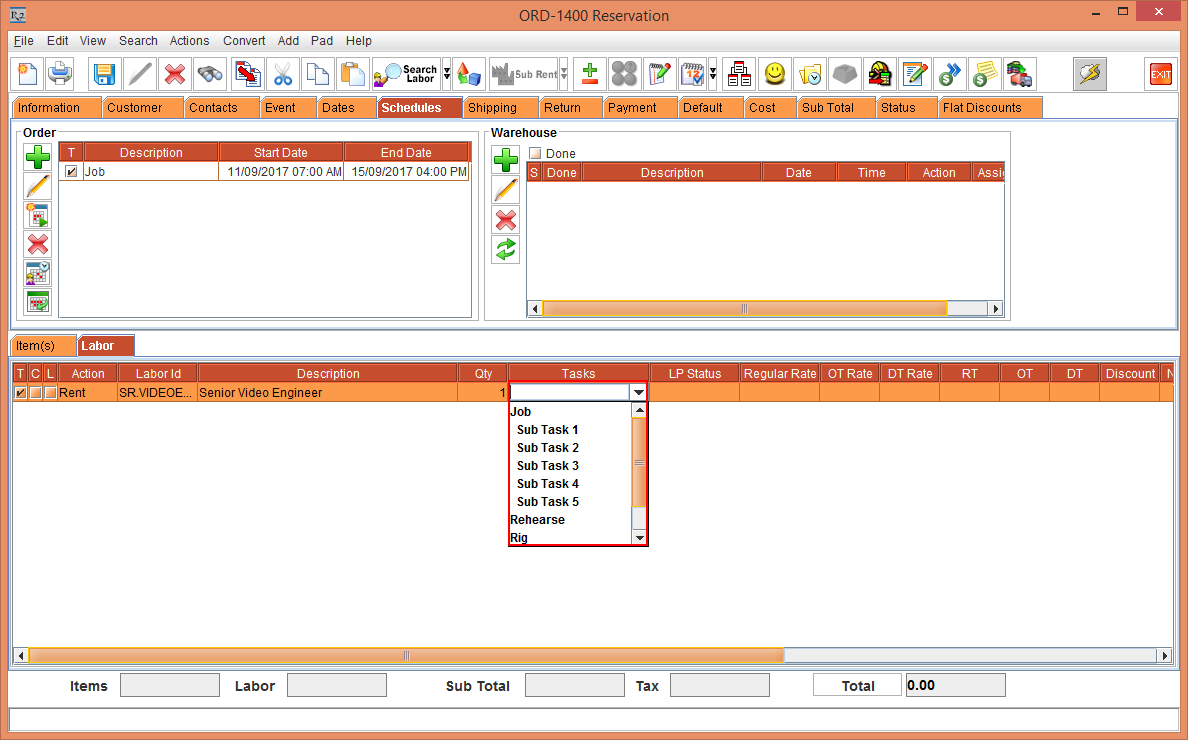
Add a Labor [SR.VIDEOENGINEER] to the Order [ORD-1400], as shown in Figure1.1.
Select the Schedules tab
> click the Add  button.
The Job Order Schedule / Itinerary Edit window is displayed.
button.
The Job Order Schedule / Itinerary Edit window is displayed.
From the Order Schedule / Itinerary section, click the importable button of the Description field. The Tasks dialog is displayed.
Select the type of Task as [Job] > click the OK button.
In the Description
field of the Order Schedule / Itinerary section, enter
[Job].
There are four buttons in the grid below the Order Schedule
/ Itinerary section. The details of each button is as described
in the following Table 1.0.
NOTE: Each Sub Task has to have a Task Description
as it is a mandatory field. This allows you to select the Task
or Sub Task from the Task drop-down option present in
the Labor line.
Button |
Name |
Description |
|
Add New Line |
This button is used to add a new Sub Task for a single day starting from the Start Date into the grid table. When you want to manually create Sub Tasks for a particular day to be included in to the Main Task, this button can be used. |
|
Add New Lines |
This
button is used to add new Sub Tasks for each single day
starting from the Start Date till the End Date. |
|
Delete |
This
button is used to Delete any Sub Tasks that are
present in the grid. |
|
Load/Reload Time Sheet Lines |
This button is used to automatically append the changes (deletion / addition of any Sub Tasks) done - by newly generating all the Sub Tasks for each single day starting from the Start Date till the End Date. |
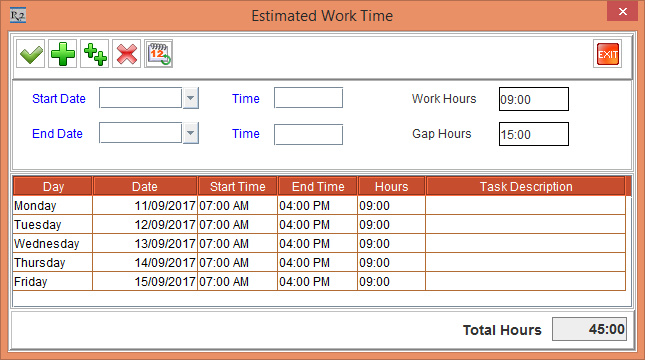
Click the Add New Lines button. There will be 4 Sub Tasks generated starting from the Start Date till the End Date. Enter the Task Description for each of the Sub Tasks as [Sub Task 1], [Sub Task 2], [Sub Task 3], [Sub Task 4] and [Sub Task 5]. This is, as shown in the Figure 1.2.
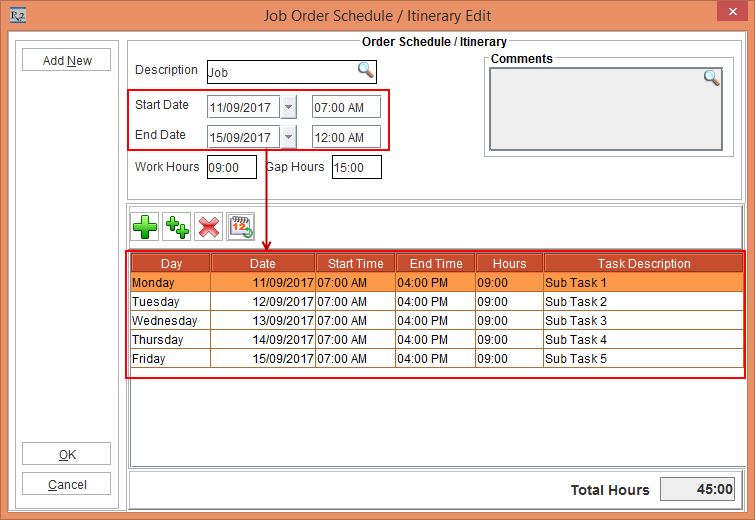
NOTE:
In the Estimated Work Time window, the Start Date and Work Hours are fetched from the fields Labor Start Time and Labor Work Hours of the Site Edit window.
In the Estimated Work Time window, the Gap Hours is calculated : (24 Hours per day - Work Hours = Gap Hours).
The End Date > Time is calculated as the sum of Labor Start Time and Return Dates Time.
Click the OK button.
In the Labor line of the Order, tag the Task as [JOB], as shown in the Figure 1.3.
NOTE:
The Tasks drop-down option will comprise of Tasks which are predefined and Schedules defined in the Order. The Tasks in the drop-down are displayed in the alphabetical order.
In the Labor line if the Task assigned is cleared, the Dates (Start Date and End Date) associated with is will be retained. If the Dates also have to be cleared then this can be done by - right-clicking the Labor line and selecting the Clear Dates option.
From the Order Schedule / Itinerary Edit window > in the Description field when the predefined Task is selected, the Dates are fetched as per the Dates set in the Configuration module.
For the Labor line, the RT is calculated depending on the difference between the Start Date and End Date.
If the Task selected for the Labor line is predefined in the Configuration module, then the RT is calculated depending on the difference between the predefined Dates defined in the Configuration module.
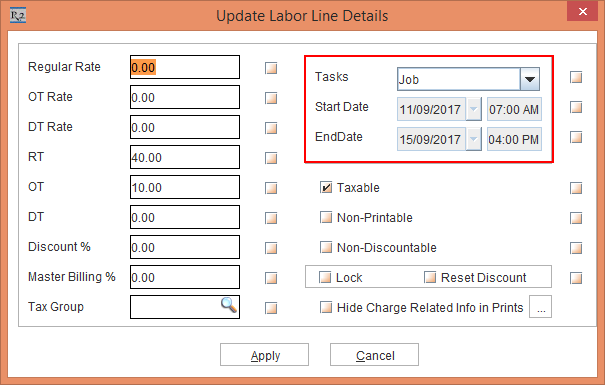
You can assign Tasks from the Update Labor Line Details window too. Select the Labor line > right-click and select the Update Labor Line Details option as shown here.
In the Task drop-down option, if you select a Schedule having Sub Tasks, the Start Date and End Date cannot be modified (the field appears to be in-edit able).
In the Task drop-down option, if you select a Schedule not having Sub Tasks, the Start Date and End Date can be modified.
In the Task drop-down option, if you select a predefined Task, the Start Date and End Date can be modified.
From
the Order, when the Apply Task Dates
check-box is selected in the Order
Dates window, the Task Dates
can be modified to the Order Dates
or the predefined Dates (from
Configuration module) by the
following:
Select the Actions menu >
Change Dates > All
Lines. A dialog saying "R2_00197:
This operation cannot be reverted back. Do you want to continue?".
Click the Yes button.
When the Apply Task Dates check-box is selected in the Order Dates window, and a Schedule which is also a Task (defined in the Configuration module) is tagged to the Labor line, then those Task Dates are applied to the Labor line.
Click the Assign Dates
 button. The Estimated Work
Time dialog is displayed listing all the assigned days, as shown
in the Figure1.4.
button. The Estimated Work
Time dialog is displayed listing all the assigned days, as shown
in the Figure1.4.
NOTE:
If you select any Sub Task in the Task drop-down menu of the Labor line, then the selected Sub Task is listed in the Estimated Work Time dialog.
You can set the Task / Sub Task for the Labor from the Task drop-down menu of the Labor line in the following places:
Order > Labor line > right-click and select, Assign Dates option> Estimated Work Time dialog.
Order >
click the Assign Dates  button > Estimated Work Time
dialog.
button > Estimated Work Time
dialog.
Order > Labor line > right-click and select Update Labor Line Details options > Update Labor Line Details dialog > Tasks drop-down option.
Save and exit the Order [ORD-1400] in R2.
Login to R2 Labor application > Planning tab > search the Order [ORD-1400].
Open the Order [ORD-1400].
Click the Estimated
Work Time  button. The Estimated
Work Time dialog is displayed, as shown in the Figure 1.5.
button. The Estimated
Work Time dialog is displayed, as shown in the Figure 1.5.
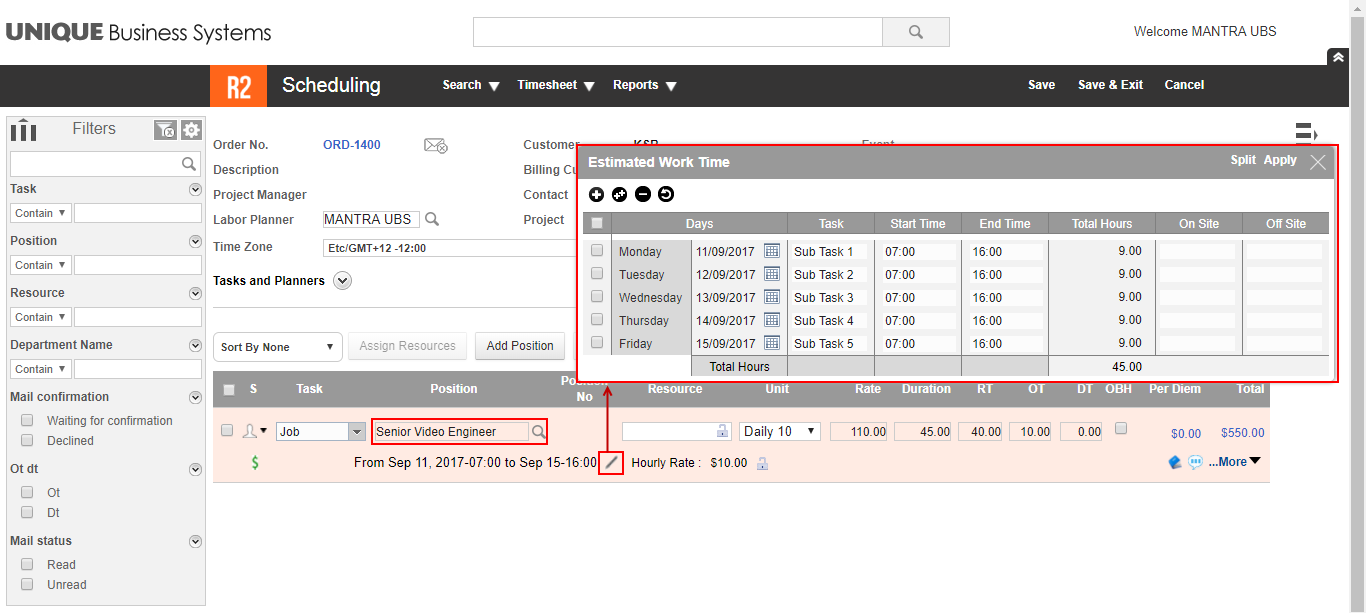
As you can see, the Main Task [JOB] entries have been listed in the Estimated Work Time dialog of R2 Labor.
You can view or edit the Estimated Work Time from the Estimated Work Time dialog. If there is any change made here, this will be reflected in the R2 application.